
Gas welding is only one of multiple types of welding processes and is a task that requires incredible skill to pull off. It offers better control in how the metal panels are put together. However, it’s also easy to mess up, and mistakes can be costly. As such, if the welding project is important to you, it’s not a good idea to go into it without the right know-how. Of course, if you’re a beginner, there are limited resources teaching you the nuances of gas welding aluminum. However, if you keep reading, the steps for gas welding aluminum and why you take them will become clear as day. You can even avoid buying MIG and TIG welders for aluminum if you already own some of the necessary equipment. Ultimately you will need practice before getting good at it, but this guide will be an excellent place to start you off.
In the sections below, you’ll learn about the materials and tools you need to have before starting the weld and why, how to prepare your welding setup, and the welding process itself.
First, you’ll need your practice aluminum sheets. Typically your sheets should be between 1/32 to 1 in. thick. Heat dissipates much quicker in gas welding than it does in arc welding. As such, if you go any thicker, there won’t be enough heat to weld the aluminum pieces together. Also, it’s pretty easy to burn holes through the metal by choosing thinner than the recommended range.
Next, you have to acquire gas cylinders. This will include both an acetylene and an oxygen gas cylinder. This answers the question of what gas is best for welding aluminum? Acetylene is preferred since it burns hotter when mixed with oxygen and the torch tips are smaller in size.
You can switch it out for hydrogen to create an oxyhydrogen mix, but you’ll get lower temperatures and may also have to use much bigger tips for the welding process. That said, oxyhydrogen will allow you a wider range of gas pressures to work with.
Next, you will need pressure regulators for both cylinders so you can control the flow of the gases into your torch. Speaking of torches, you’ll need a torch as well.
Welding torches come fitted with valves for the oxygen and acetylene/hydrogen gas and mixing chambers for the gasses. You’ll likely need a lighter to ignite the flame as well.
A wire brush may also be necessary. According to Science Direct Trusted Source Oxidation of Aluminum and Its Alloys - ScienceDirect Aluminum is an extremely reactive metal and its usefulness as an engineering material is due to the tough, thin, highly protective, self-healing surface oxide film that readily forms when freshly created surfaces are exposed to the environment. www.sciencedirect.com an oxide layer forms on the metal when exposed to air. The oxide layer requires a lot more heat to melt compared to the aluminum below it, and getting rid of it using a wire brush, or something similar will be a huge help for your project.
Also, you’ll need aluminum welding flux for the same reason. Typically they’ll come in powder form to be mixed with water. Once heated by the torch, the flux melts and forms a protective layer on the melted pool of metal. It will also break up the oxide and allow the melted pool to cool at its own pace.
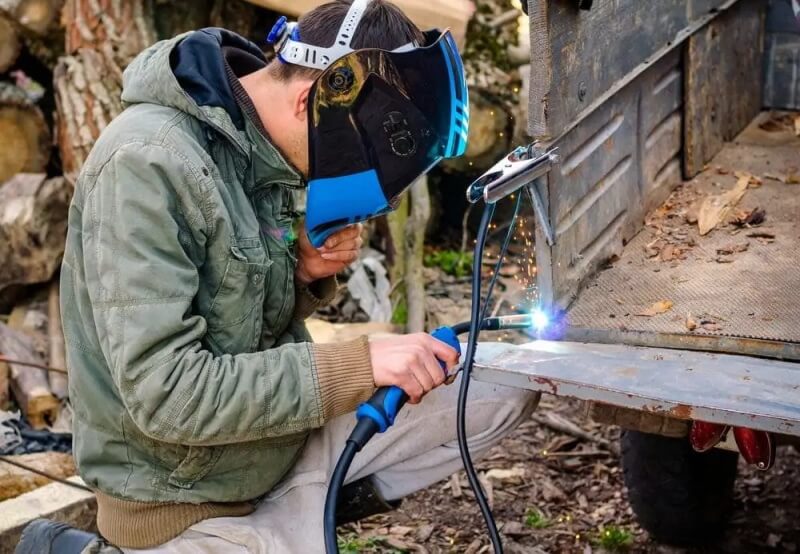
Finally, some safety equipment may come in handy. Fire or heat-resistant gloves for instant protect your hands from the heat. According to users, the RAPICCA 16 Inches,932℉ gloves are well suited to the job as they’re long enough to protect your forearms. Also, the design and materials used mean they can withstand temperatures of up to 500°C.
Add some goggles or a safety mask in addition to an overall. Lastly, have some clamps that you can use to hold the metal pieces in place as you weld.
Setting up your workshop for an aluminum weld project is pretty simple. In some cases, you’ll need a filler metal. If you have extra sheets of a similar aluminum alloy, you can cut off some thin strips using your tools and use them as the filler material.
Sometimes it’s possible to avoid using filler material, but that only works with pure aluminum alloys. Otherwise, if you don’t use a filler in higher strength alloys, weld cracking will likely occur down the road.
Also, if you’re welding thick aluminum, i.e., 3/16 in and thicker, you should bevel the sheets to ensure optimum penetration. The beveling angle can be between 60° and 120° depending on the thickness of the sheets.
Another thing you should do during the preparation stage is mixing your flux powder with water. As we mentioned above, it comes in powder foam. However, you’ll need to make it into a paste or liquid before you can apply it to the metal.
After that, take your wire brush and use it to clean the edges of your stock and the filler material. Follow up by applying the flux paste using a brush or spraying it onto the weldable edge and the filler material.
Set the pressure for both the oxygen and acetylene tanks. As we mentioned above, this is how you control the flow of gases to your torch. Ideally, you want a neutral flame which, according to the American Welding Society Trusted Source Neutral Flame | American Welding Society Education Online An oxyfuel gas flame that is neither oxidizing nor reducing. It is a quiet and clean flame obtained by burning approximately 50% acetylene and 50% oxygen. awo.aws.org , you can get by burning both the oxygen and acetylene in equal parts. Usually, you can set this up using the valves in your torch, and you might have to play with them a little to get the best flame.
While a slightly reducing flame is somewhat acceptable, an oxidizing flame will reintroduce an aluminum oxide layer, and as we stated above, this can be detrimental to your weld. You can then light your flame to start the welding process. Typically, if you’re using oxy-acetylene for welding aluminum, you begin by opening the acetylene valve in the torch before using a lighter to ignite the flame.
You then open the oxygen valve and adjust the two valves to get a clear blue neutral flame.
If you’re using arc welding, such as with MIG and TIG welders for aluminum welds, pre-heating the stock is unnecessary. The same is true if the stock is thinner than ¼”.
However, this step can help with a few aspects when practicing how to gas weld aluminum. One example is it helps reduce thermal stresses in the metal. Additionally, it helps boost the welding speeds and allows for better penetration in your welds.
There are a couple of don’ts for heat-treating aluminum as well. For instance, when dealing with heat-treated alloys, you can cause a hot-short if you pre-heat the metal too much. This can lead to deterioration of the metal’s strength.
If you’re using thinner aluminum, warming the edges of your stock with the torch just before you start welding should be enough.
To ensure you get the right pre-heat temperature, you can use the carburizing test. This is where you set your flame to use low oxygen. This flame produces a lot of soot that you can then use to cover some parts of the stock.
Once done, you can change the flame back and use it to pre-heat the metal. You’ll know the metal is at the right temperature when the soot disappears from the surface. Nevertheless, it’s a bad idea to allow the soot near the edges you intend to weld. It can cause porosity which is generally bad for the quality of your weld.

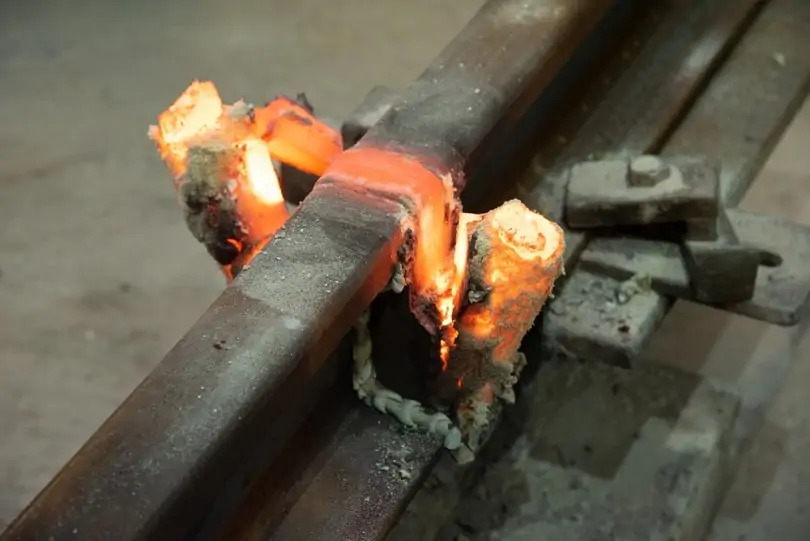
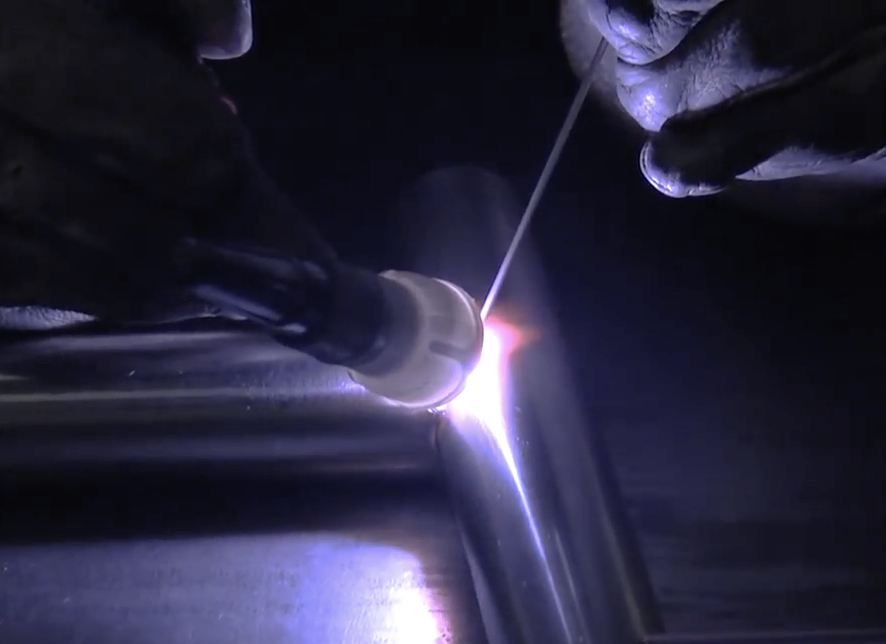
You only start welding once the metal is pre-heated sufficiently and you’ve added the flux to the edges. You’ll also need your filler metal in the hand that’s not holding the torch. Pass the torch in small circles over the spot where you intend to start your weld. The flux will melt first, followed by the base metal.
You might even need to get closer to the base metal so you can keep a better eye on it as you weld. This will necessitate the protective mask we mentioned above. According to reviewers, the YESWELDER LYG-M800H welder mask might be perfect for such a job as it offers a true-color view to allow users to see their weld better. Also, the pivot style headgear will enable you to comfortably wear it for longer.
You can use the filler rod to catch the exact moment your base metal starts to melt. Scrape it over the toe surface of your weld area every three to four seconds and lift it over the flame when you’re done. Once you scrape and find the base metal to be melted, you can start traveling the torch.
Notably, forehand/push welding rather than backhand welding is preferred when joining aluminum stock. As such, the flame from your torch will be pointed in the direction that your weld is progressing. The filler material will remain just ahead of the torch as you progress.
If you’re working with thinner stock, you’ll likely only need to progress the flame forward. However, when working with thicker alternatives, you might have to incorporate side-to-side motions to ensure better distribution of the weld metal.
Also, back and forth motions can help the flux eliminate any remaining oxide in the sheets as you go along. Remember to dip the filler metal occasionally into the molten pool before pulling it out. This will melt the end and integrate it with the weld.
Additionally, you should pull the filler out in the same direction as your weld progression. This is another way to eliminate oxidation in the weld while at the same time preventing porosity. The filler metal should leave extra material both on the top and bottom of the panel.
If there isn’t any filler material on the bottom, then you’re likely not getting enough penetration. This can be remedied by heating the same spot with the flame for longer.
The other side of this coin is that if you leave the flame to heat one spot too long, it will either blow a hole through the base metal or distort the panel. This is why practice is needed before you can take on important gas weld aluminum projects.
Also worth noting is that gas welding aluminum in windy conditions is not ideal. Once done, you can clean the weld with boiling water. A fine brush can also be used if you can easily access the weld area.
However, the weld area may not always be so accessible. This does not mean you can blow off cleaning as the flux will react with the metal over time. You can use flux removers as an alternative, but they’re also corrosive and toxic. Use caution and protective clothing, including masks, to prevent inhaling fumes as you’re handling them.
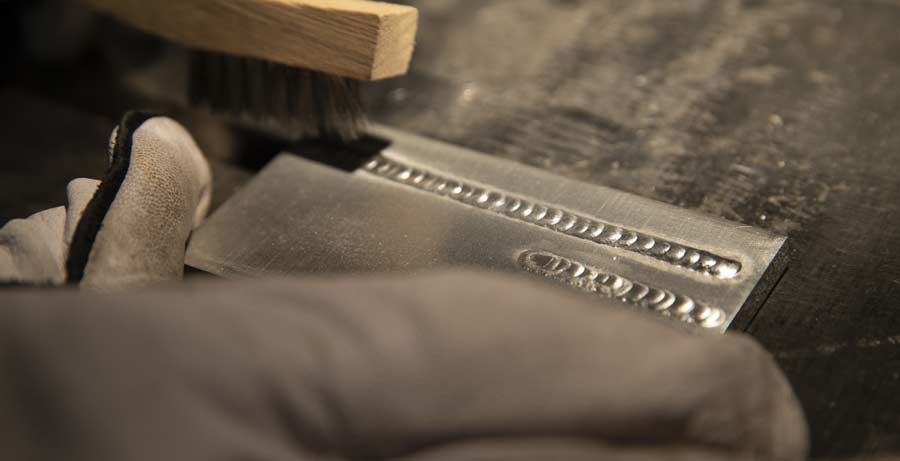
Once done, use a hammer and dolly to compact the welded sections. Finishing may also involve filing down the protrusions in the weld using a rasp file or a flap wheel. Ideally, after finishing, you shouldn’t be able to tell the difference between the original sheets and the welded component.
Getting your welds to the point where you can’t differentiate between the original sheets and the newly added components may take practice, and multiple welding runs. However, you’re bound to get the hang of it over time. After that, you can take on as many gas welding aluminum projects as you want. You can even confidently attempt repairs that require skill and precision.