
Welding titanium is unlike most other welding projects, especially regarding the difficulty. There are so many nuances to consider, and making a mistake in any one of them could lead to a brittle end product. As such, you need to have the skill, in-depth knowledge of the metal, and the right equipment if you have any hope of pulling it off. This includes knowing just how different welding this metal is compared to other welding projects. Thankfully, welding titanium is possible even in smaller shops and welding studios, and we get into the most efficient ways to do it below.
 As mentioned above, titanium is quite different from other weldable materials, including nickel-based alloys and steel. These differences dictate the steps necessary for a successful weld, so you need to be aware of them. They include the fact that titanium is less elastic than nickel-based alloys and steel. Next, titanium is less dense and ductile. This is in addition to having a higher melting point.
Also, compared to steel and nickel-based alloys, titanium gals quite easily, and the metal is easily contaminated during welding, which can lead to a brittle weld. Notably, accounting for these differences is the only way to ensure success during your welding project.
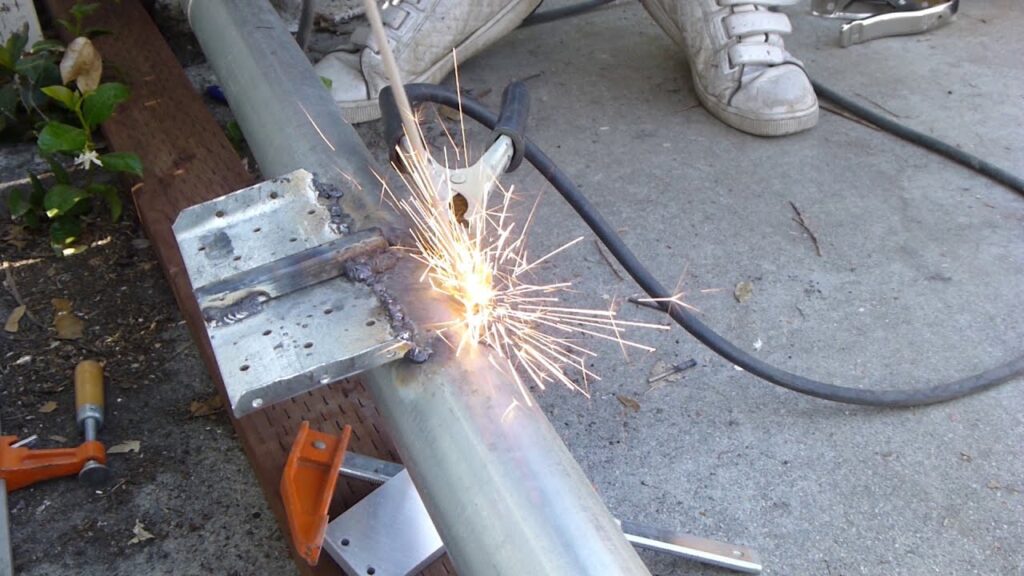
You have a couple of options regarding the welding process for your titanium welds. They include plasma arc welding, friction welding, electron beam welding, and resistance welding. However, these have limited uses and are typically not found in most home or hobbyist welding studios.
That said, the most common welding processes used include MIG and TIG welding, and we focus on these two in the write-up below. As such, if you have a TIG, MIG welder, or even a multi-process machine in your workshop, you should be good to go.
TIG welding, according to Educalingo Trusted Source TIG WELDING - Definition and synonyms of TIG welding in the English dictionary «Tig welding» Gas tungsten arc welding, also known as tungsten inert gas welding, is an arc welding process that uses a non-consumable tungsten … educalingo.com , uses non-consumable electrodes and incorporates both a filler metal and an inert shielding gas. With MIG welding, the wire electrode is a consumable, and shielding gas is also dispensed by the torch.
Notably, if your project involves putting together titanium sheets that are ½” or thicker, a MIG welder will be easier on your pocket. On the other hand, if the metal sheets are thinner, using TIG welding shouldn’t be a problem. Nevertheless, you have to ensure there’s no contact between the tungsten electrode and the molten puddle as you work to prevent tungsten pickup.
 How to Weld Titanium?
Here’s the full guide for MIG or TIG welding titanium.
As mentioned above, a key differentiator for titanium is that it can easily be contaminated as you weld by materials such as dirt, grease, oil, other metals, moisture, mill scale, and more. This leads to reduced structural integrity and is also why welding titanium to steel is not recommended.
Consequently, if you’re going to learn how to weld titanium, it’s best to start by setting aside a separate work area in your workshop that only deals with the metal. Ideally, it should be enclosed to prevent contaminants produced by dirt-producing operations, e.g., grinding, painting, and more, from making it into the space and ruining your welds.
Additionally, you should control drafts and moisture in that enclosed space as they are just as bad.
Some beginner welding machines may not be capable of MIG or TIG welding, and it’s best to make sure yours can do the job before you look into getting the other tools and equipment. If you intend to use a MIG welder and don’t have one on hand, the Weldpro MIG155GSV comes highly recommended by users. Its ability to run on either 110V or 220V sockets means it’s a plug-and-play device no matter the electrical setup in your workshop.
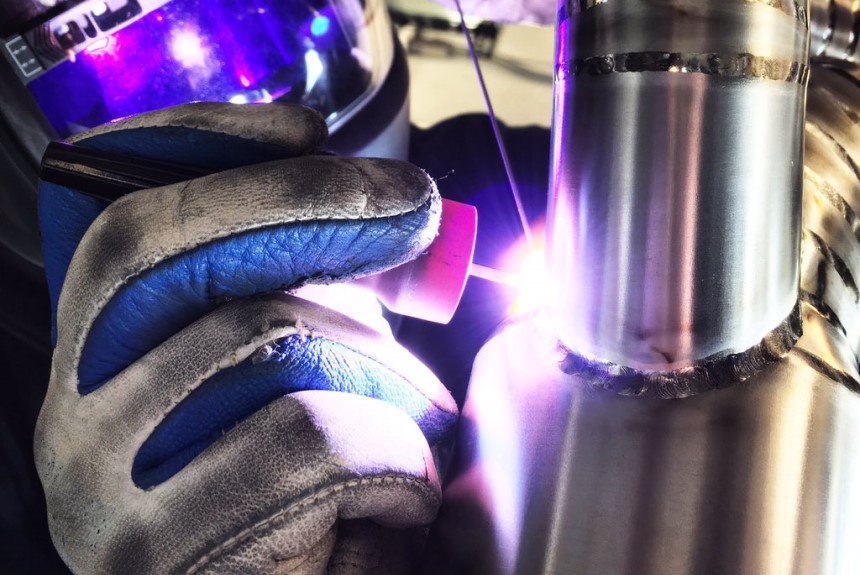
In addition to the welding machine, you’ll need a water-cooled welding torch. If you’re using a TIG welder, it should be fitted with a gas lens and a ¾” ceramic cup. The latter helps provide adequate shielding for the molten weld puddle. As for the gas lens, it keeps gas flow uniform and stable, therefore, providing better shielding for the puddle.
Thoriated tungsten electrodes are also necessary for TIG welding titanium. According to reviewers, the 10-pack 2% lanthanated welding electrodes are some of the most reliable electrodes for welding titanium. They also work for copper alloys, nickel alloys, and stainless steel. If you’re using a MIG welder, a 1” ceramic cup is more suited to the job. Pointed electrodes are also necessary if you want better control of your welding arc.
Of course, you’re going to need shielding gas as well. While both helium and argon can work, argon provides better arc stability. However, a mix of the two gases is preferred if you’re using a higher voltage which leads to greater penetration thanks to the hotter arc.
Next, you need separate gas shielding setups for the primary, secondary, and back-shielding of the weld. Primary shielding will be provided by the torch. Secondary shielding should be provided by a trailing shield, most of which are custom-made to fit your project. Back shielding may also require custom shields to keep the inert gas around the metal until it’s cool enough.
Depending on the size of the titanium, filler metals with matching properties may also be necessary. However, if you’re dealing with alloys or pure commercial grade titanium, it’s better to pick a filler metal that’s a strength level lower than the base metal.
A cleaning solution is also necessary. After all, you need to ensure there are no contaminants on the surface of the titanium or the filler metal before you start welding. Something like acetone is a good option.
Additionally, you need a dedicated stainless steel wire brush. By dedicated, we mean you shouldn’t use it to clean other metals apart from titanium. Lastly, you also need a dedicated file for preparing your weld joints.
Joint designs for titanium look like joint designs for other metals at face value. However, due to the differences we mentioned above, there may be some extra steps involved in the preparation stage to ensure you get everything right. One example is the removal of impurities from not only the weld area but also the heat-affected zones and the back of the weld area as well.
The joint surfaces should also be smooth hence the inclusion of a file in the list of tools and equipment that you’ll need. Use the file to grind down sharp edges, burrs, and even burn marks left behind by mechanical grinding.
Ideally, you want a smooth, uniform connection in your joint fit-up. This helps remove air pockets in the joint that may contaminate the weld. Sandpaper may seem like a good idea for filing down the sharp edges and burrs, but it’ll likely leave contaminants in your setup, which in the end does more harm than good.
Additionally, you want to design the joint fit-up with provisions for secondary and back shielding. If you can’t find a way to incorporate shielding, then the finished product will likely crack. Next, the titanium sheets to be welded need to be clamped together. Any movement during the welding process can lead to uneven shielding, ruining the weld end product.
Titanium oxide also needs to be removed from the equation. This will involve grinding down the 1” space between the joint and the rest of the metal on both sheets of metal. Furthermore, you should grind both the upper and lower surfaces.
Once you’ve filed down the edges and removed the titanium oxide, you need to clean the titanium, and there are several ways to do this. The most common option is to use non-chlorinated cleaning solutions to clean the weld joints. Notably, this also involves cleaning the area around the weld joint. Remember, the heat-affected zones around the joint are just as easily contaminated as the weld area.
Use lint-free cloth for the clean-up since lint is just another contaminant that may adversely affect the quality of your weld. Follow up by wire brushing the cleaned area with the dedicated stainless steel brush.
In a few cases using household cleaners or detergents, then rinsing with hot water, and finally leaving the metal to air dry may be acceptable. Alternatively, acid is also an option but is often only used in cases where there is a lot of dirt on the titanium. Admittedly acid is not an excellent choice for a first-timer as it complicates the clean-up process. As such, you should be careful in how you source your titanium for the project and only pick sheets with minimal dirt.
Once the joints and surrounding areas are clean, preserve them by wrapping them in plastic and avoid handling them until you start welding. Lastly, during the preparation stage, you may want to try welding a scrap piece of titanium metal to ensure everything is in working order. That way, you can deal with potential issues before you start TIG or MIG welding titanium.
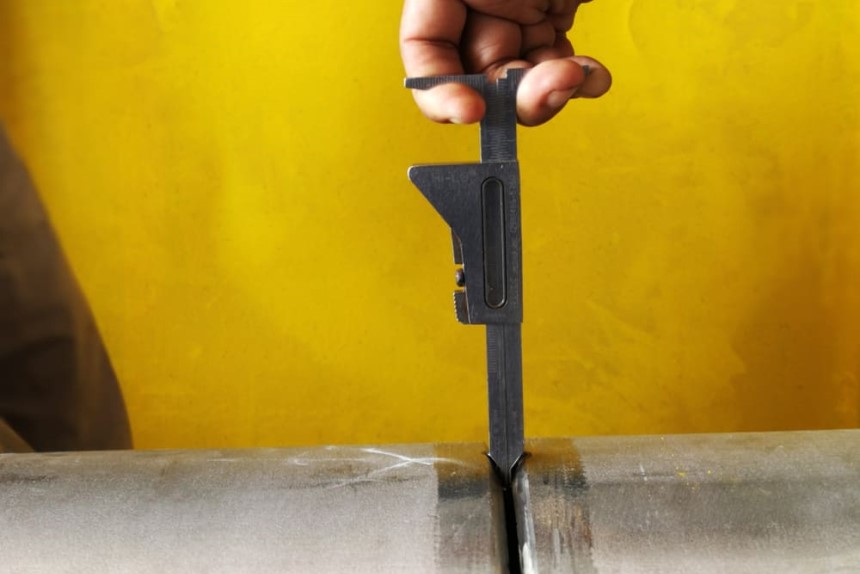 Joint fit-up is arguably one of the most critical aspects of your titanium weld projects as well. In fact, you risk burning through the metal and introducing contaminants if you mess it up. As such, the fit-up should be kept as uniform as possible. If you notice any bumps and gaps, it’s best to file down the metal until it’s smooth enough for a uniform fit.
Any part of the titanium that’s heated past 800°F is going to be susceptible to contamination from the environment. This includes the weld puddle, the heat-affected areas around the puddle, and the underside of the weld hence the need for primary, secondary, and back shielding.
Primary shielding will be incorporated into your welding torch, which is why we insist on either ¾” or 1” ceramic welding cups in your setup, depending on whether you’re MIG welding or TIG welding titanium. The gas lens should be able to keep the gas flow non-turbulent as you weld, which means the weld puddle will be shielded until it cools down. That said, you also have to use the correct flow rates as recommended by the manufacturer.
The secondary shielding setup should keep the inert gas in circulation over the solidified weld puddle and adjacent heat-affected zones for a bit longer until the metal is below 800°F. The back shielding setup may also look a lot like the secondary shielding device. Additionally, it’s meant to follow the movements of your welding torch so it can keep up with the parts of the metal that are being heated.
Also, all air on the backside of the metal must be purged using the inert gas before heat is introduced; otherwise, the weld will be contaminated. You may need to use the ratio 10:1 in favor of the inert gas compared to the air at the back of the weld to ensure no contaminants remain.
Using a timer to control pre-purge and post-purge for primary shielding will help ensure the shielding is present before the arc is activated and after the arc is deactivated. Notably, you should allow for between 2-5 seconds, depending on the size of the metal. Of course, with a longer pre-purge, you’ll ensure zero contaminants in your weld area when the arc is finally turned on.
As for post purge, the gas should continue flowing over the weld area for up to 25 seconds after you turn off the arc. Remember, we emphasized the importance of using different gas setups for primary, secondary, and back shielding. Manual solenoid switches, for instance, allow you to switch the secondary and back shielding off only when you’re sure the metal is cool enough not to be contaminated.
Additionally, the gas flow rates are different for primary shielding compared to secondary and back shielding. 20 cfh may work for primary shielding but is a bit excessive for back shielding, where 10 cfh per linear foot should be enough.
Argon works best for most trailing shields due to its high density. It’s also often cheaper than helium. That said, helium may also be used in cases where the weld is above the shielding setup due to the lower density. Lastly, the dewpoint for the helium and argon used in titanium welding projects should be -50°F or lower.
As for the welding process, once you’ve set up the shielding as well as cleaned and prepared your metal, here’s what to do. First, you’re going to attempt to weld a scrap piece of metal to ensure everything is well configured and in working order. If not, repeating some of the preparation, clean-up, and setup steps may be necessary. You can also check the quality and condition of the gas cylinders, pipes, and regulators to ensure there aren’t any problems.
Once you’ve corrected any potential issues, you may proceed. Ensure you always pre-purge the back shield, torch, and secondary shield before starting your arc. High-frequency arc starts are also recommended. According to the Tulsa Welding School Trusted Source How to Strike an Arc in TIG Welding - Tulsa Welding School Striking an arc means to establish a welding current across a gap between the welding electrode and the base metal.1 Welding training programs may offer www.tws.edu , high frequency starts ionize the air between the electrode and metal, which results in a non-contact start.
Notably, non-contact starts also help prevent tungsten contamination of the weld. As mentioned above, hot titanium is very susceptible to contamination even from the electrode. The other two types of starts, i.e., scratch starts and lift arc starts, involve some contact between the electrode and the base metal, which can be problematic. Additionally, you’ll have to clip off the filler metal after it has been cleaned, and this will also help ensure zero contamination.
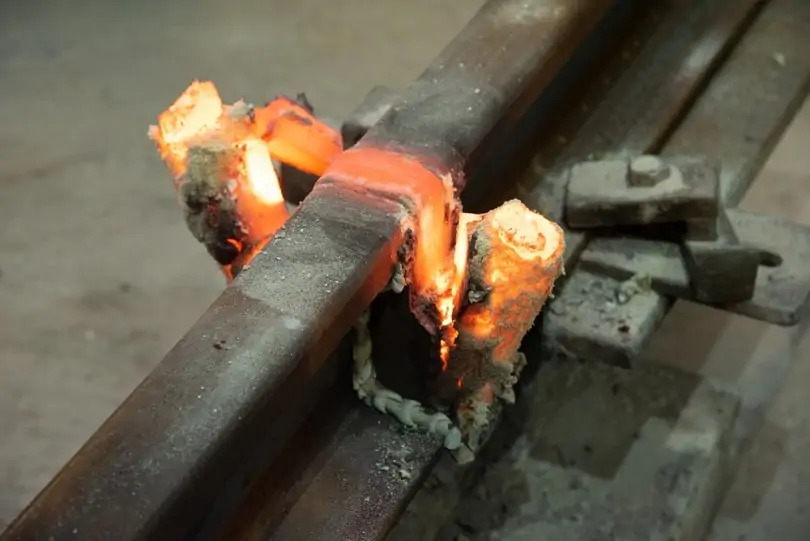
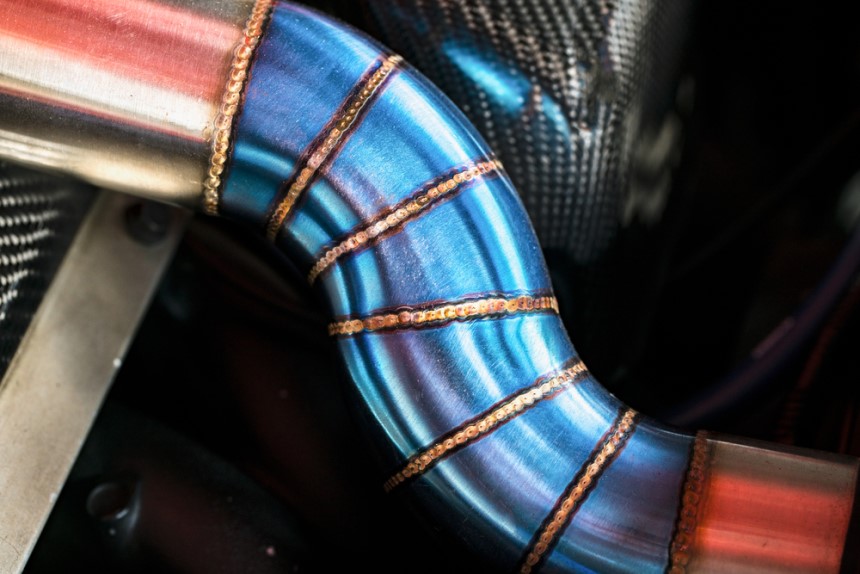
Hold the tack welds to as high a standard as the rest of the weld. Consequently, any problems in the tack weld colors should be treated the same as defects in the rest of the weld. Welded titanium should maintain a bright silvery sheen. Even straws and browns may be acceptable, but any other color configuration or discoloration that includes blues, whites, greens, and greys is indicative of a problem.
It’s a good idea to stop the process every few minutes so you can examine the weld. This allows you to check the quality of the weld so you can catch problems and contamination early. As you’re using the filler metal, keep it shielded by the inert gas provided by your torch. Also, whenever you turn off the arc and start it again, assume the tip of the filler metal is contaminated and clip it.
One of the downsides of learning how to weld titanium is that it can be incredibly frustrating if any contamination is introduced to the weld. Notably, color is an excellent indicator of whether the weld is contaminated or not. Once contamination has been verified, all that’s left is to cut away the damaged titanium and start afresh.
Welded titanium has some pretty impressive features, such as corrosion resistance, ductility, and extremely tensile strength. However, this all could be ruined by improper welding, which introduces contaminants in the metal and ultimately will lead to cracks and lower durability in the end product.
That said, welding titanium is no walk in the park, especially for newbies. It involves a lot of work in the preparation, clean-up, and even the welding phases, more so than other weldable metals. It may also require more resources given the equipment and tools you have to use. Nevertheless, if you want to reap the benefits of welding the metal, the guide above should tell you which steps are necessary and why.