
Metalworking is something many people wish to master. Operating the different metalwork machines and tools can overwhelm a beginner, and understandably so. But the trick, according to the experts, is to learn one small thing each day, and over time, you will have mastered metalwork. In this guide, we are going to learn how to use a plasma cutter.
Operating a plasma cutter can be a challenge for a beginner. Here, we will learn what a plasma cutter is, the different types available, setting it up, and the best ways of using one. Learning how to use a plasma cutter properly guarantees its durability, your safety, and of course, the production of pristine quality products. It is important to note that different plasma cutters are set up differently, meaning each has its unique working mechanism. We are going to learn all about that here.
A plasma cutter is a primary tool in many established metal workshops and fabrication shops. This machine looks very much like a high-temperature gas. It conducts electricity and will cut all electrically conducting metals. When electricity is fed into it with an 110v or 220v plug, it processes such electricity making it able to cut with great precision virtually any metal you can think of.
When the machine is switched on, a plasma arc is created by electrically heating the air to an extremely high temperature. The high temperature ionizes the atoms hence allowing them to conduct electricity. This is how a plasma cutter cuts large pieces of metal just like a chainsaw cuts a huge log within seconds. Even the best plasma cutter under 500 can deliver marvelous results.
There mainly two types of plasma cutters;
 These are plasma cutters that are designed to work on large-scale projects. They’re commonly found in large steel-cutting project sites and industrial production lines. They are computer-operated, and this is where you will find computer numerically controlled (CNC) plasma cutters.
It is critical that you learn how to use a CNC plasma cutter before you can even buy it. You will need to have CAD creating and editing knowledge to be able to operate a CNC cutter. Under CNC cutters, you will find the 2D/2 axis, 3D/3+ axis, and tube and section plasma cutters.
 These plasma cutters are universally available in workshops and fabrication shops. They are ideal for lighter work which might involve the trimming of small pieces of metal. They are categorized into two groups, namely;
To get the best value off your plasma cutter, you will need to understand how it operates. Unexperienced welders might use unproper technique for metal’s treatment, while it was smarter to use a welding machine for aluminum. Mastering the use of this machine allows you to work on a wide range of DIY projects. This will also help you do some basic troubleshooting whenever the need arises. For starters, plasma cutters use different types of air but, in many cases, natural compressed air. Once inside the plasma cutter, the compressed gas is heated in a chamber found between the electrode and the torch tip ionizing the gas, creating plasma. Though plasma conducts electricity and cuts metals that conduct electricity, it behaves and even looks like a high-temperature gas.
In the chamber, the plasma expands exponentially, and the torch tip helps exert pressure hence making it eject at a very high speed toward the piece you are working on. The temperatures can reach 30,000 degrees Fahrenheit. Because of the intensity of the plasma, a localized area on a metal piece is melted by the jet. The pressure of the jet removes the molten metal as it cuts.
 Working with a high-performance plasma cutter demands that you invest in safety measures and standards. This machine can cause severe injury and property damage if handled by unqualified personnel. Learning how to operate a plasma machine does is not complicated, and with some basic training, you should have an easy time working with it.
The following are some of the essential safety gear that every plasma cutter operator should have in place.
 To operate a plasma cutter effectively and efficiently, you will need several pieces of equipment. They are;
You must learn how to use a plasma cutter properly if you are to make the most use of the machine. Here are some safety hazards to bear in mind when you buy or operate a plasma cutter;
A plasma cutter requires some preparation before you can start working with it. Besides ensuring the machine is in working condition and the spare parts are ready, you should be in the right state of mind and health.
Some of the parts to ensure are in good working condition include;
 All plasma cutters work differently, which means that you may have to consult your manual first. Some have their in-built air compressor while others may need you to plug in an external one. That said, here are a couple of general tips to help you use your plasma cutter properly.
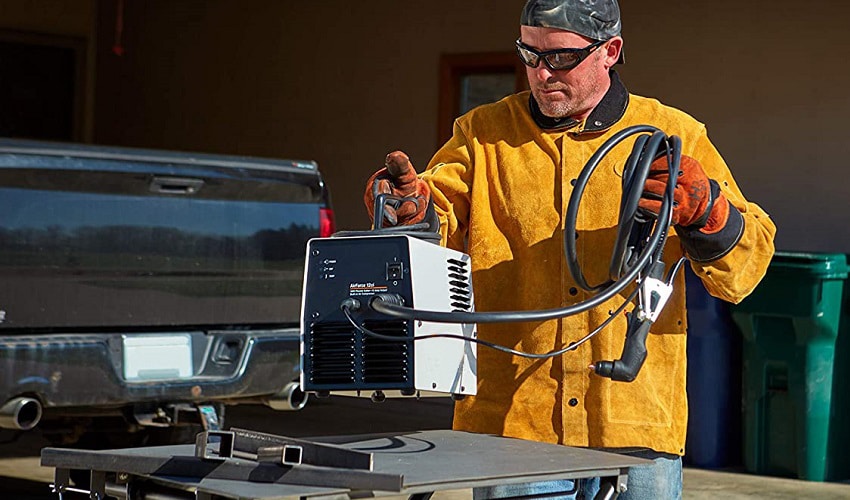
Using a plasma cutter requires some personal protective clothing to prevent any dangerous accidents. Some of the common welding PPE’s recommended by ANSI include helmets and handshields that protect your neck and face from the heat produced by your plasma cutter. There are several helmets on the market but Antra Wide Shade Range Welding Helmet stands out as one of the best helmets in the market due to its lightweight, robust safety features, reliability, comfort, and a permanent shade that protects you from UV rays. You should also find dark clothes that cover all parts of your body to protect you from the UV light and possible burns. Other types of protective clothing Trusted Source Know your welding personal protective equipment (PPE) | 2018-04-24 | ISHN Eye and face protection: Proper eye and face protection for welding safety varies depending on the particular task being performed. Helmets, handshield, goggles and safety glasses or combination of these are acceptable protection in various applications. All filter lenses and plates must meet the test for transmission of radiant energy prescribed in ANSI/ISEA Z87.1-2015, American National Standard for Occupational and Educational Personal Eye and Face Protection Devices. According to OSHA 29 CFR 1910.252 (b)(2)(ii)(B), “Helmets and hand shields shall be arranged to protect the face, . . . www.ishn.com include leather gloves, gauntlet cuffs and flame-resistant aprons. You should also find a suitable working area that is well-ventilated. This not only ensures proper air circulation but also prevents any explosions from happening. Any flammable material in your work area should be covered and put more than 10 meters from your cutter.
It is crucial to ensure that everything is ready before you start using your plasma cutter. You should ensure that your machine gets sufficient air and has a working pressure gauge. Check your user manual to find out the exact pressure that you need and set it before starting out. You may note that the pressure will drop once you start using your machine and get back to your set pressure after. Do not worry, this is normal and expected.
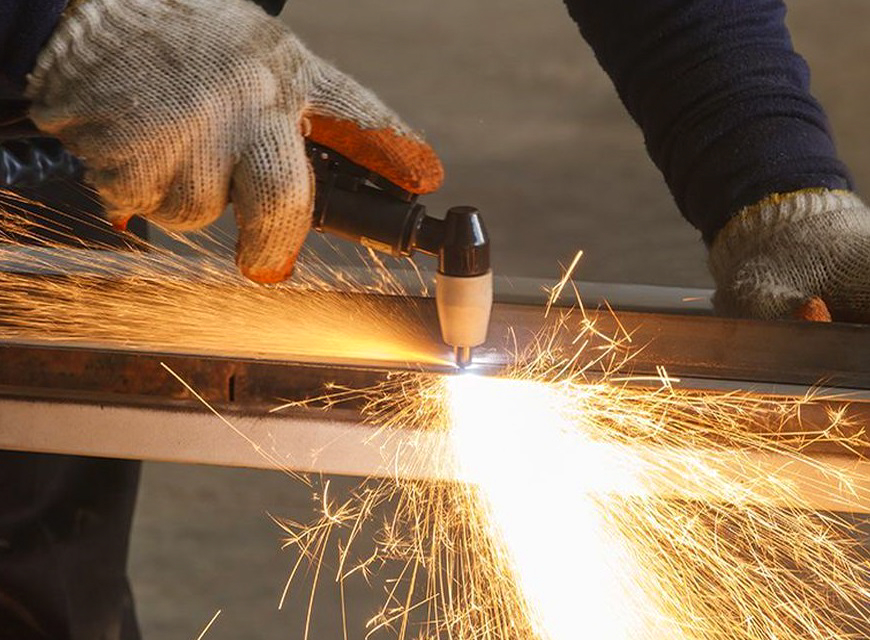
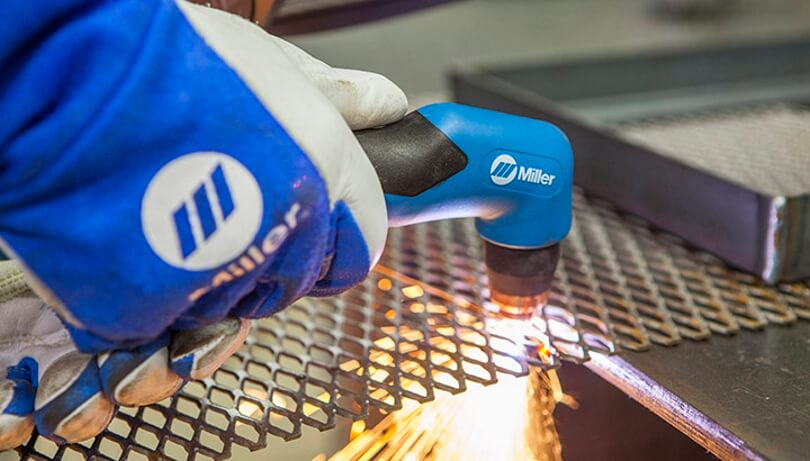
Your drag shield will help you get an accurate cut when your are using it. But how do you use your drag shield? Simply place it at a 90-degree angle with the piece of metal that you intend to cut. This will help you to make accurate cuts with ease as you can easily follow the cut marks you have made. Some plasma cutters do not have drag shields but this should not worry you. If your cutter does not come with a drag shield simply hold your cutter half a centimeter from the metal but be sure to maintain a 90-degree angle when cutting.
Be sure to remove the trigger lock and press the trigger as you maintain the 90-degree angle. Once you press it, a spray of plasma should splash through the plasma torch. Your plasma cutter should penetrate the metal and cut it through to its surface. Watch out for sparks at the bottom of the metal that you are cutting. If there are little to no sparks then this simply means that your cutter is not powerful enough. What does this mean? You are either doing it too fast, there is little amperage, or that you are not maintaining a perpendicular angle.
At this point, you should slowly move your plasma cutter through the metal. It should cut through the metal effectively and one way to know this is by passing the cutter slowly and evenly. If there are no sparks beneath the metal then you need to determine what the issue is. For example, if you do not see any sparks because you are moving fast then you need to slow own your cutting speed. If there is too much sparks then you can increase your speed. Once you reach the edge of the metal, take a moment before you release the trigger to ensure the metal is cut completely.
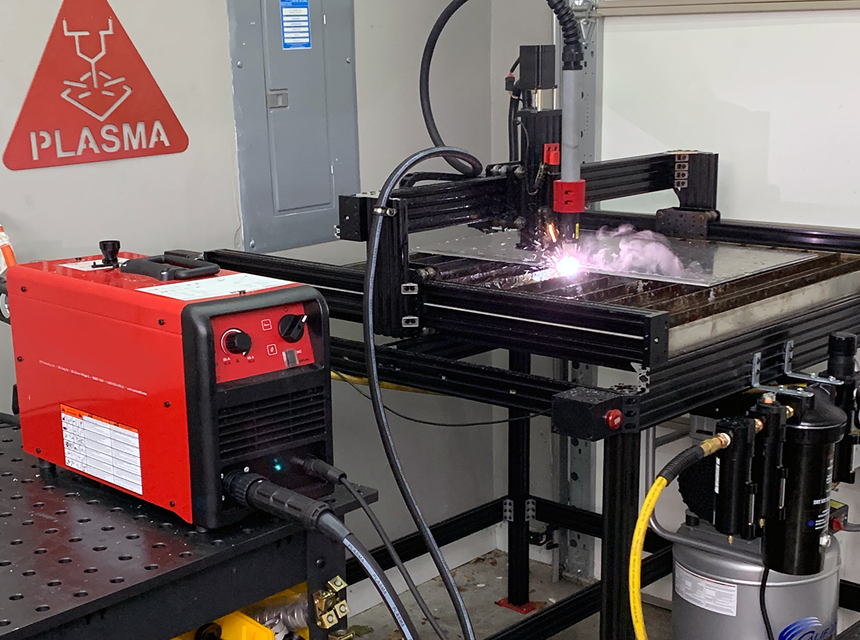
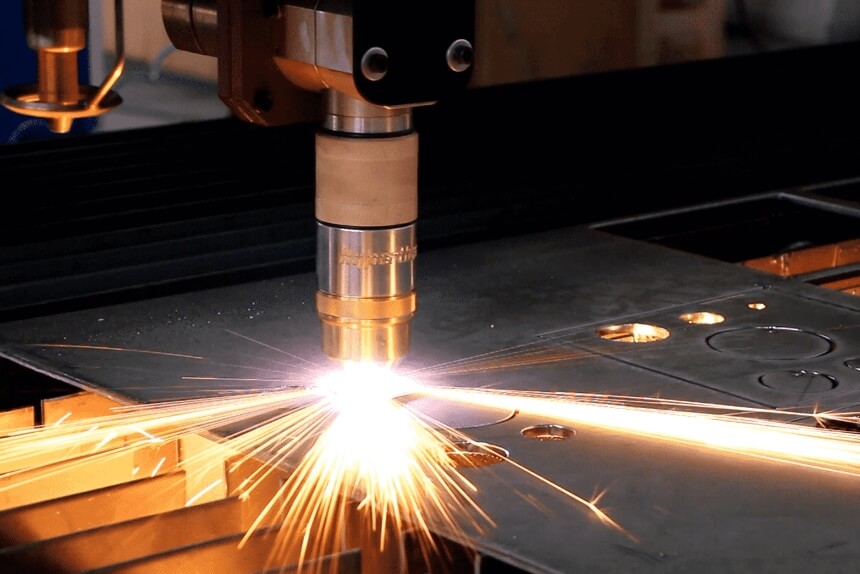
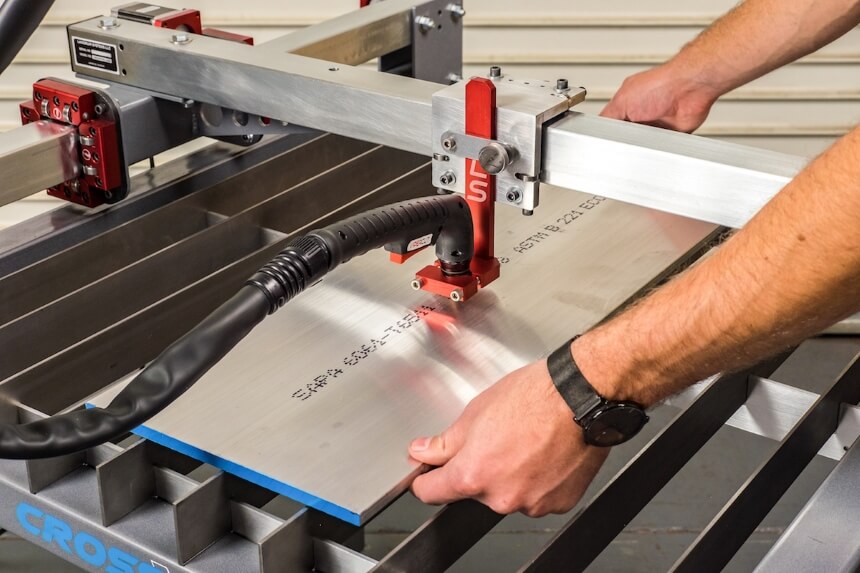 CNC plasma cutters, also known as Computer Numerical Control, vary starkly from the other hand-held cutters. This means that a computer is used to control the motion of the machine depending on the program used. These types of plasma cutters are often used to create decorative works such as wall arts, garden art, and signages etc. Here are some few steps to take when you want to use your CNC plasma cutter.
The first step to using your CNC plasma cutter is ensuring that the machine is in the right condition. First, it is important that you figure out the power needs of your CNC plasma cutter. Some plasma cutters use a 3-phase connection while others use a one-phase connection. It is up to you to pick the correct power connection depending on your machine. Check the user manual for your CNC plasma cutter for this information. Second, you should ensure that the metal being cut is firmly positioned on the operating table. Failure to do this might result in a poorly cut or designed metal specimen at the end of the process. Lastly, you should keep some significant distance from the operating table once the machine starts working.
Your CNC plasma cutter comes with a compatible software that you can use to run the machine. It is important to learn the ins and outs of using this software if you want to make professional cuts or designs. Simply install the program and practice with some poor grade metal until you feel confident enough. After this, you can move on to creating beautiful or majestic designs on some good quality metal.
Create an actual plan of the cuts you desire. You should use the CNC plasma cutter software to create the design that you want. Just ensure you get the precise measurements (length and width) of the cutting table and transfer them to the X and Y axis of the software. Your plasma cutter will then read the program you created and send a signal to the machine’s system. Consequently, the machine will move into the desired direction by pointing the torch in the programmed manner and at the defined speed. The communication between the machine and the drive system is pretty quick allowing the two to synchronize and change data in seconds. This results in consistent yet sleek cuts that are made exactly as programmed.
Confirm the overall arrangement of the table before pressing the CUT button. You may be sure that the metal is well placed on the table but it never hurts to check once more. Remember that any errors when placing your metal or when configuring the software will result in a poorly cut metal design. Once you confirm that everything is in order, you can finally hit the cut button and let the machine start its work. You can also choose to use the laser if you do not wish to use its moving parts. This means that you can set the machine at one fixed point and move the metal by hand. While some people may not use this feature, it can be a great way to create handmade designs.
Finish the cut. The machine will stop the cutting process once everything is completed. You can wait for the metal to cool down and see if the design was exactly as you had programmed it.
Is it really important to buy a popular brand? Can you get a generic model instead as long as it works? Right? Well, most of these generic brands haven’t been around for long. This may not be a problem initially but what happens when such businesses go under and you get a problem. Such problems are unlikely to happen when you invest in quality products from top brands like Hobart and Miller.
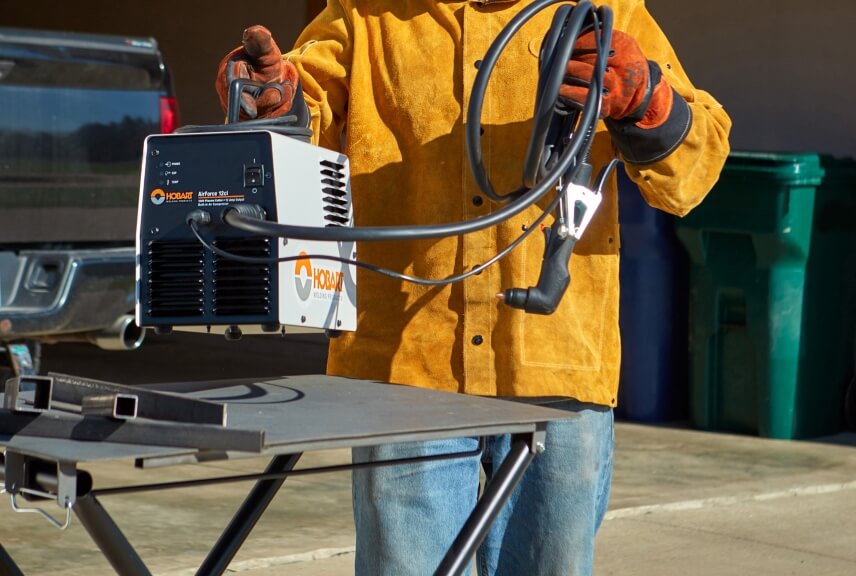 Founded in 1917, Hobart has dedicated much of this time in creating quality welding products. The firm has dedicated years, if not decades, in refining their products such as their plasma cutters. All the welding and cutting products made by this firm can be used for industrial purposes and are certified too. So, whether you are a professional welder or you simply want to practice on your metalworking skill, you will always find a reliable product from this firm.
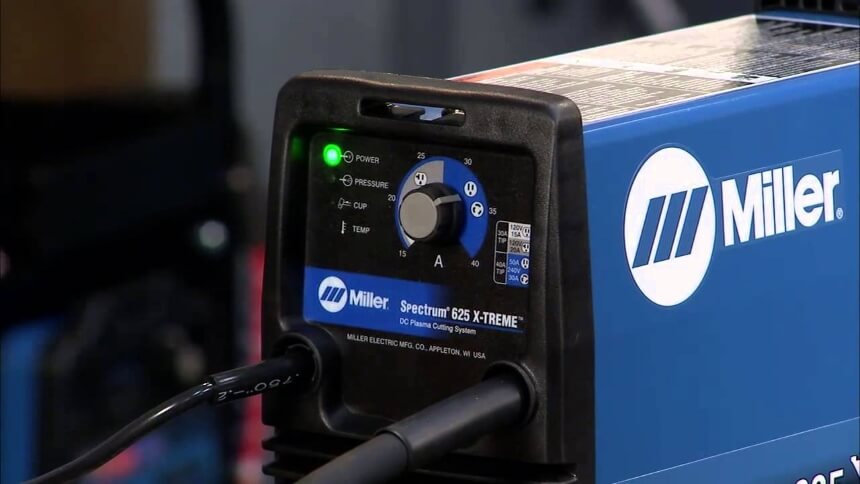 Miller is another firm that has showed its prowess in developing quality welding and cutting products. This company started as a small company in 1929 to become a large manufacturer of welding products that are sold globally. Miller not only focuses on creating quality products but also on welding safety. They have several products in the market and a robust customer service to take care of any issues you may have.
Using a plasma cutter is not as complicated as it looks. Yes, it may have a steep learning curve, especially if you want to become a professional welder. However, consistent learning and practice can set you apart from other welders. Whether you want to use a hand-held or a CNC plasma cutter, it is important to learn how to use a plasma cutter. The simple steps provided in this post will not only ensure that you are a pro in no time but will also ensure you have a safe metalworking experience.