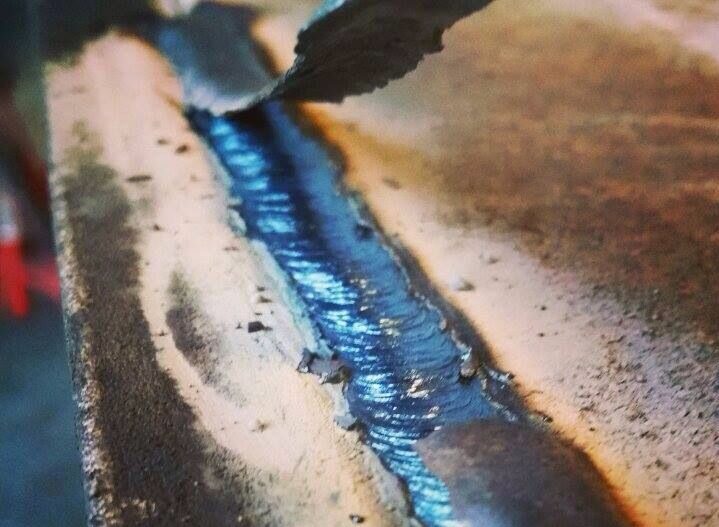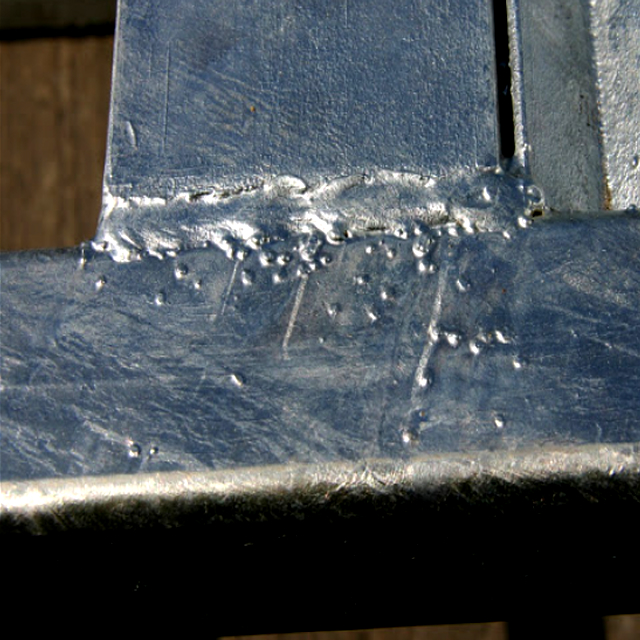

After welding your metal pieces together, the post-welding process is important if you want to have a smooth and aesthetic finish and keep your customer satisfied. Weld beads may be a filler that reinforces the welded joint but sometimes you don’t want them to be there and must be removed during the finish-up process of your welding job.
There are a lot of ways to remove weld beads or slags. From plasma cutting to torch cutting, and the use of grinders, drills, and circular saws, we’ll show you how to remove a weld. However, you have to know that there are always methods of removing weld beads and resistance spot welds.
There are two general methods of removing a weld bead. These are mechanical and thermal methods.
The mechanical methods involve the use of cold cutting techniques, involving manual and electronic tools, in removing the beads or spot welds. Some of these methods include the use of chisel, drill, saws, grinders, and more. Mechanical methods are ideal for when you’re not necessarily removing the weld completely and cutting the metal open. They’re ideal for when you are just trying to remove the weld slags.
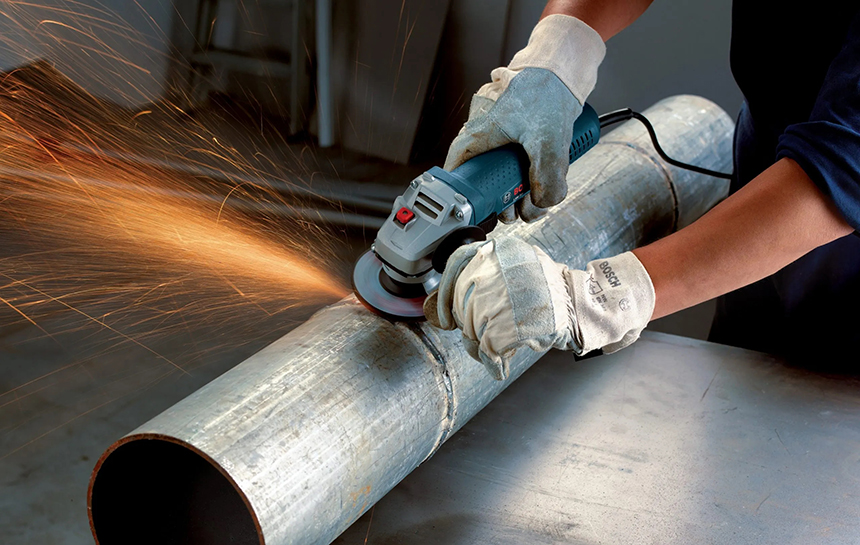
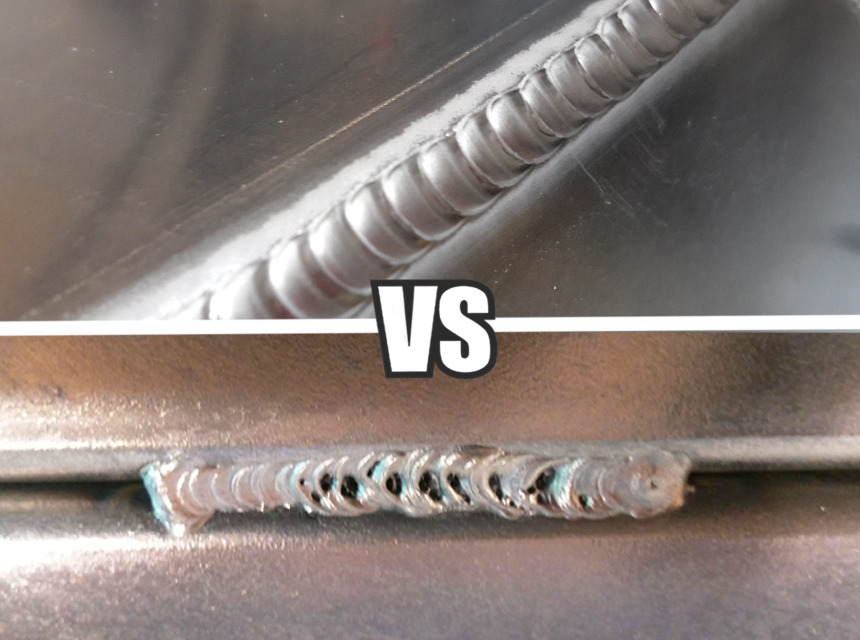
The first method involves grinding the weld bead. To carry out this operation, use a segmented flap disc in combination with an angle grinder. The Black + Decker angle grinder is one of the easiest to use. The disc must be able to produce extremely homogeneous appearances and perfectly regular results.
Pro tip: The speed of the grinder should be as low as possible. The speed can be around 2,100 rpm or level 1.
To grind the weld bead, select the slowest speed on your angle grinder. With our angle grinder EWS 14-125 this corresponds to a speed of 2,100 rpm/level 1.3. The grinding disc is used to remove discoloration and sanding marks and to achieve the finish
Positioning at an angle of incidence of approximately 10 to 15 ° is important. To avoid deformation, it is recommended to exert pressure only on the weld bead.
The work once done can leave traces of deposit/crowning at the welded joints. If these irregularities cannot be completely removed with the segmented grinding disc, a dry sanding disc will take care of it.
Adjust the look with a reclosable sanding roller for a smoother finish. This type of roller can be used for matting, burnishing, polishing, transitioning, cleaning oxide layers, and removing discoloration.
Lastly, the welded part can be eliminated through the action of a chisel when struck with a hammer. This system is not recommended because of the damage it causes to the metal.
To do this, the chisel is inserted obliquely (about 45º) between the two joined panels until it stops with the surface that is still welded. The chisel is then repeatedly tapped until the final separation is obtained.
The chisel also facilitates the removal of the panels when it is inserted perpendicularly and struck on its side so that it moves through the perimeter of the panels.
If mechanical methods are mostly cold cutting techniques, it’s safe to say that thermal methods make use of heat or flame in cutting the weld beads. Some of these methods include the use of plasma cutters and torches.
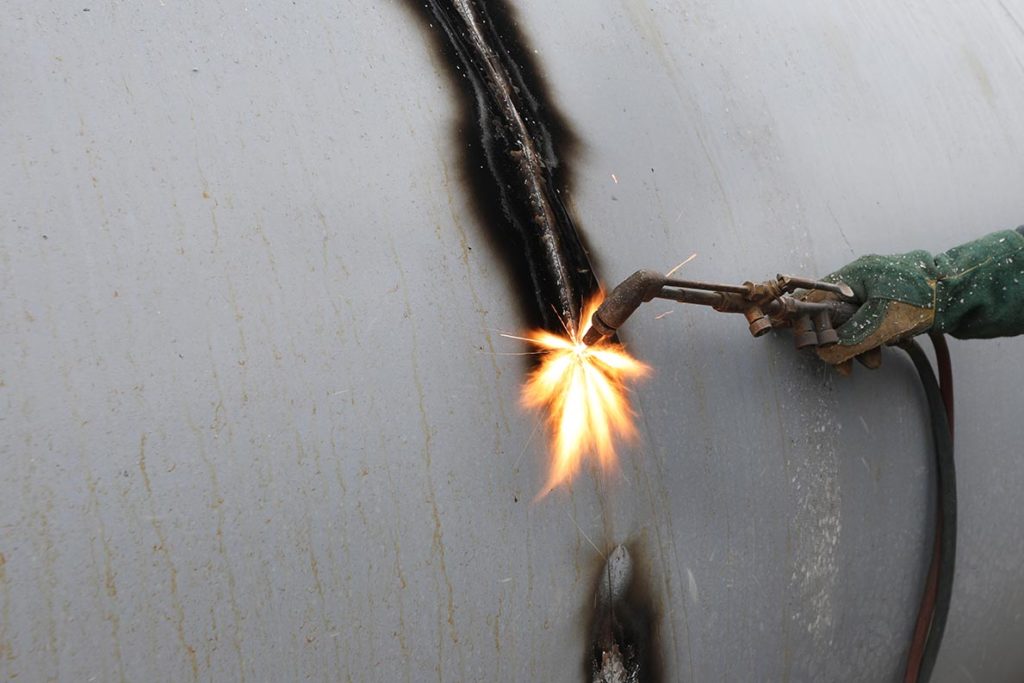
Torches are some of the most common devices for cutting metal. They are also efficient in removing weld beads by cutting them open.
The torches can generate flames of up to 6,300 degrees Fahrenheit and they combine oxygen and acetylene for this. However, torch cutting is risky and not suitable for beginners.
When producing a hot flame that can cut through metal pieces, the torch uses the blend of the two gases with the cutting torch. All you need to do is mark the weld line where you want to cut and light your torch.
Finish up by gradually following the drawn line and cutting through.
Cutting with a plasma cutter is a procedure where you separate electrical conductors with the use of a jet of plasma. With this technique, you will form an arc with a direct current (DC). Temperatures of plasma cutting can reach 50,000 degrees Fahrenheit Trusted Source Plasma arc welding - Wikipedia en.wikipedia.org .
Plasma cutting is faster, cutting five times faster than most manual torches. It can also cut through various materials and thicknesses. It is much easier to use and does not use flammable gases. This method will therefore be suitable for welds created by a flux core welder.
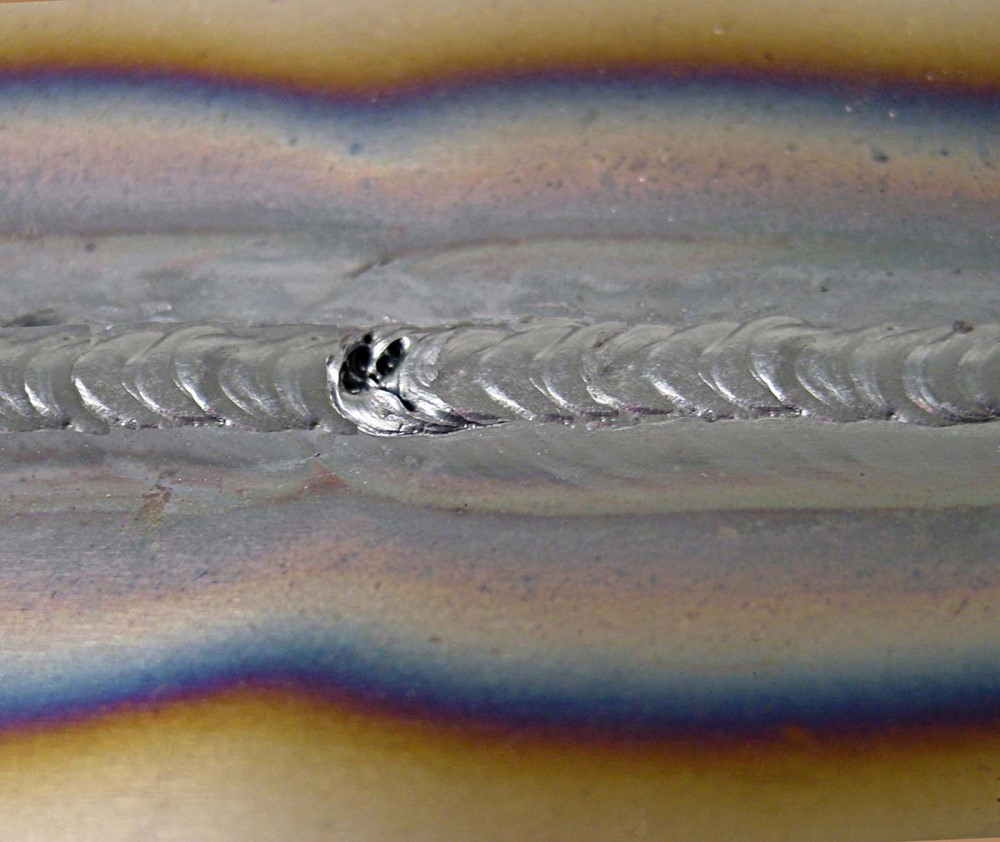
The resistance spot welding Trusted Source What is Spot Welding? (A Complete Welding Process Guide) - TWI Resistance Spot Welding is a resistance welding process that is used primary for welding two or more metal sheets together by heating and applying pressure to the weld area. www.twi-global.com is the welding system most used at the factory for joining steel bodies. Therefore, whenever a structural component that is welded with this welding method needs to be replaced, the workshop professional must take into consideration which tools allow this operation to be carried out, as well as the peculiarities of each one of them.
Resistance spot welding is generally located around the entire perimeter of a part so that they are covered by the sealing rubbers, by elements that cover the bodywork, or by paints such as anti-gravel coatings. In the latter case, it is necessary to brush the area to discover the spot and be able to remove it.
The methods that allow the elimination of this type of welding are listed below and we will see them in detail:
If you are a car restoration enthusiast or auto body repair expert who uses a single or multi-process welder, removing weld spots is part of the job. Simply drilling through the weld spot is the most time-efficient and cost-effective way to get the job done. But if the back layer of veneer has to remain intact, using a Blair Spotweld cutter, or any other brand of spot weld cutter, is the way to go. A spot weld cutter cuts the entire spotweld, but the metal will retain its joint weld and probably won’t have to be reweld.
You need a special drill with an almost flat point angle (between 1 and 3 degrees) equipped with two, three, and up to four cutting edges. The very small angle facilitates the drilling of the point without going too deep into the lower plate, thus reducing damage to the component that is not going to be replaced. However, the introduction of several cutting edges facilitates drilling in the hardest steels (boron steels).
Traditional blunt bits are manufactured with high-speed HSS steels, although the introduction of high, very high, and ultra-high-strength steels in modern bodies makes it necessary to have bits that are capable of drilling these steels, showing levels of resistance to damage. For this reason, manufacturers introduce alloys such as tungsten carbide or cobalt into the drill manufacturing process. They also often include enhancement treatments such as TIN (titanium nitride) coatings.
This method stands out for the speed, reliability, and cleanliness of drilling it offers. Above all, it damages the lower plate to a lesser extent when it is mounted on a trimmer equipped with depth-of-cut control. Its main drawback is the high price of the drills and trimmer, as well as the loss of cutting power when not used properly.
To drill the spot, it is essential to take into account the following precautions:
Measure the diameter of the weld spots to be drilled with a tape measure. Locate and purchase a metal drill and use drill bits that must be larger than the diameter of the weld points. The Eonlion 14-Pack Spot Weld Drill Bits Set is one of the best spot welding removing sets.
If you want to use a more specialized tool that will keep the metal back piece intact, use a Spotweld Blair cutter. Multiple sizes are available, so choose the size closest to the size of the spot weld (rather than choosing one that is 1/8 to 1/4 inch larger). The rest of the instructions are explained thus.
Weld spots can be either flush with the rest of the metal surface or embossed above the metal surface. In either case, drilling a chop into the metal will better allow the bit to start drilling the metal out.
Use a Blair Spotweld Cutter if you are interested in keeping one of the metal layers intact. Always use protection for the eyes when drilling metal to avoid the possibility of eye injury.
Repeat the steps for each subsequent weld spot that needs to be removed.
Remove metal debris and shavings with a vacuum (either a regular home or shop vacuum).
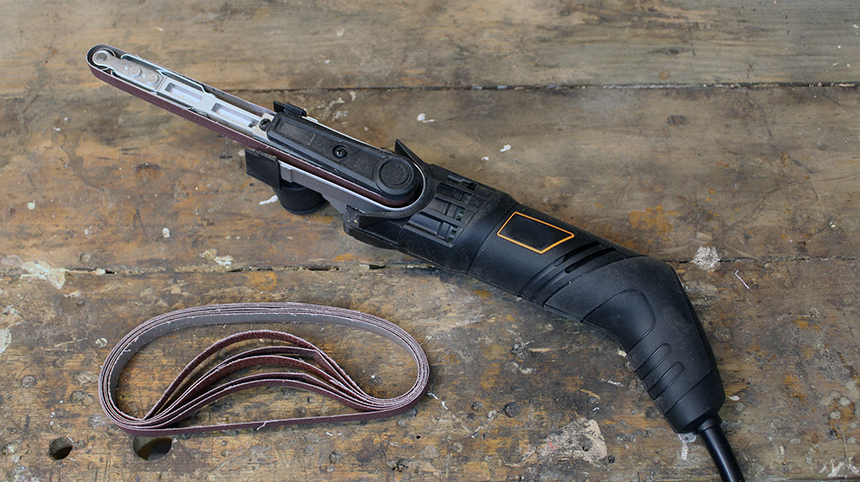
In this case, the element that eliminates the spot is continuous sandpaper in the form of a band. The sandpaper has a ceramic grain of aluminum oxide that offers great cutting power with reduced heat input. The width of the sandpaper is usually 5mm, and the most frequent sandpaper grains are P-36, P-60, and P-80.
The sandpaper is placed under tension on two opposite rotating rollers of a pneumatic belt sander (it can also be electric). As the sander is driven, the rollers rotate causing the sanding belt to move uninterruptedly to smooth out the resistance spot from continued friction.
The main advantages of this system are the durability of the abrasive used, its ease of use, and the possibility of being used to file the welds made.
However, the purchase of a belt sander is expensive and the finish is less clean, precise, and controlled than that obtained by trimming bits.
To eliminate the weld spot, simply bring the end of the sander closer to that point while maintaining a 45-degree angle of the tool.
Another way to remove the spot of resistance is through the use of a rotary cutter. For this, you can use a spherical or hemispherical rotary cutter or a circular bell cutter.
The spherical or hemispherical bur is made of hard metals (tungsten carbide, cobalt, titanium, niobium, etc.) to guarantee high cutting power and durability.
The tip of the cutter has teeth specifically made to achieve a fine finish that prevents the tool from binding or excessively damaging the metal. Its main drawback is that the cylindrical geometry of the tip makes it necessary to go deeper into the lower panel to eliminate the spot of resistance.
To eliminate the spot, it is enough to apply the tip of the cutter, with a certain inclination, to the weld while checking the progress of the milling.
In relation to the bell cutter, this is a tool that has a hollow toothed crown mounted on a metal body, and that includes a centering axis inside.
With the turn of the cutter, when it is mounted in a hole, it eats the perimeter of the spot. Despite this, as the crown is hollow and only acts on the perimeter of the spot, it is always necessary to file the remaining material afterward with a radial and grinding disc.
In addition, this system requires that the spot of resistance is scored and that the perpendicularity of the tool is maintained during milling. On the other hand, if it is not mounted on a trimmer, there is no control over the depth of the cut.

Drilling through spot welds on the frame will allow you to separate parts without destroying either part. The gap left by the drilling process allows a plug weld when reassembling the metal parts.
Measure the diameter of the spot weld with a tape measure.
Set the point of a punch in the center of the weld point. Hit the awl with a hammer.
Select a bit twice the diameter of the spot weld. Set the bit in the chuck of a variable speed drill motor. Shield the bit tip with cutting fluid.
Place the center of the bit into the hole created by the awl. Pump the trigger of the drill motor to drill into the weld spot.
Stop drilling frequently to check the depth of the drilled hole. Continue drilling until a crack is noticeable, forming at the bottom of the drilled hole. Repeat the drilling procedure at each welding spot.
Slide the end of a flathead screwdriver under a drilled weld point. Hit the end of the screwdriver with a hammer to “pop” the weld spot. Move the screwdriver along the frame to separate the frame from the panel.
The systems to eliminate weld beads and spots are diverse. Each method comes with its advantages and disadvantages that determine the final performance of the tool.
We’ve shown you how to remove a weld using various methods. However, one of the methods not mentioned is the mechanical method using a small radial. It is cheaper to have a machine of these types. They are safer machines, and their prices are affordable. They reach small spaces and holes better. Their small size makes this type of machine more versatile.
By using the right working tools and following our professional advice, you will obtain excellent, perfectly consistent results. Top-quality tools and a large selection of products will help you do the job in the best possible way and therefore also keep your customer happy. However, ensure you wear ear eye protection to protect your eyes when removing weld beads.