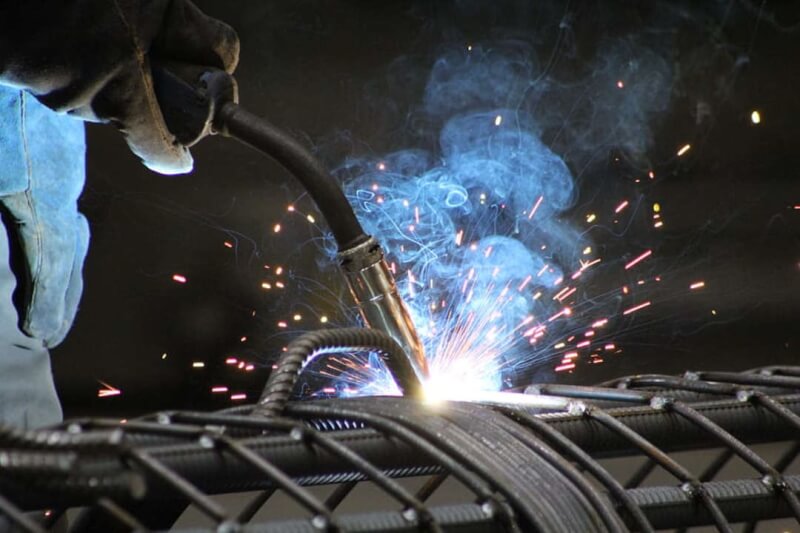

Most TIG and MIG welders have the 2T and 4T settings as a standard. Technically, 2T and 4T are the same thing on MIG and TIG welders, but there is a subtle difference in how they operate. The ‘T’ in the modes is an acronym for touch, and it denotes the number of times you ought to touch the torch trigger to start and stop welding.
Any welder with the 2T setting will require you to press the torch trigger to start and release to stop welding. The 4T setting, on the other hand, will require you to press and release the torch trigger to activate the welder and to stop the welding process. Both settings offer exceptional flexibility for approaching different types of projects. This article has in-depth details about the 2T/4T features. Read on to know their usage and benefits.
As mentioned before, the ‘T’ in the 2T and 4T modes stands for touch. Here are some more details on each mode and what they have to offer;
2T means ‘two-touch.’ The setting requires you to press the torch trigger to start the welder and release it to stop it. This makes it best suited for short welds. 2T is mostly used when working shorter welds like stitch welding, tuck welding, or welding small joints. Since it is convenient to start and stop, the 2T setting allows you to do shorts weld runs quickly. It is perfect for shorter weld runs.
2T in TIG Welding
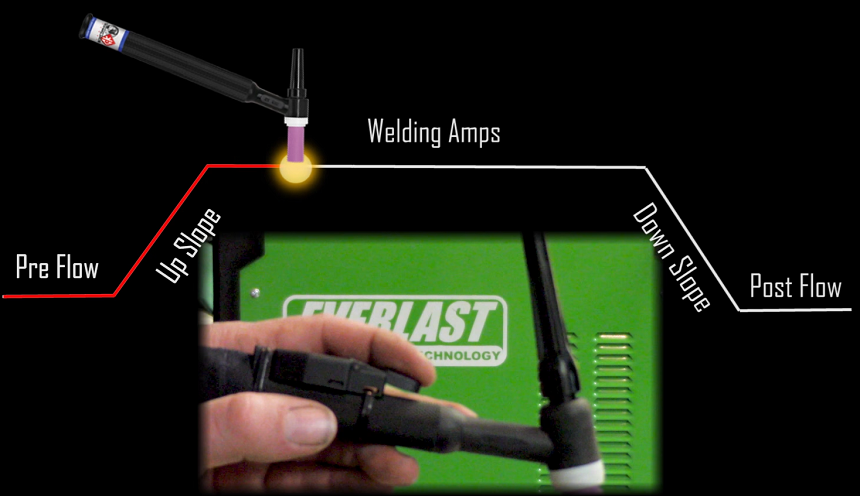
2T is pretty straightforward in TIG welding; all you have to do is set the amperage rate then let the machine reach the set amperage gradually. To prevent it from reaching the set amperage instantly, you can adjust the ramp-up and ramp-down time. This way, you wouldn’t experience a blow-through on thin metals.
Activating 2T on a TIG welder is as simple as pressing and holding the torch trigger to begin welding and releasing it to stop welding.
2T in MIG Welding
2T is not considered a function in MIG welding. Its operation is much simpler compared to TIG welding as there is no amperage to worry about. All you have to do is preset your voltage and wire speed settings.
To activate 2T in MIG welding, you press the trigger on the MIG gun to start and then release it to stop
This is a 4-touch function. To activate the welder, you need to press and release the trigger. The best thing about it is that you weld without holding the trigger. To deactivate, you press and release the trigger.
4T is mostly used to make longer weld runs and welding hard-to-reach areas that cannot allow you to hold the trigger for long. Long weld runs need stamina and great concentration.
4T in TIG Welding
The 4T feature is designed as an alternative to the foot pedal in TIG welding Trusted Source What is Tungsten Inert Gas (GTAW or TIG) Welding? - TWI The principles of TIG welding are outlined including process characteristics, power sources, arc starting, electrodes, shielding gases and applications. (Mar. 1995) www.twi-global.com . The foot pedal is usually meant to control the amperage directly but the 4T function is an On/Off switch on the torch with a preset amperage. You can’t use the foot pedal and switch torch at the same time. You have to choose one.
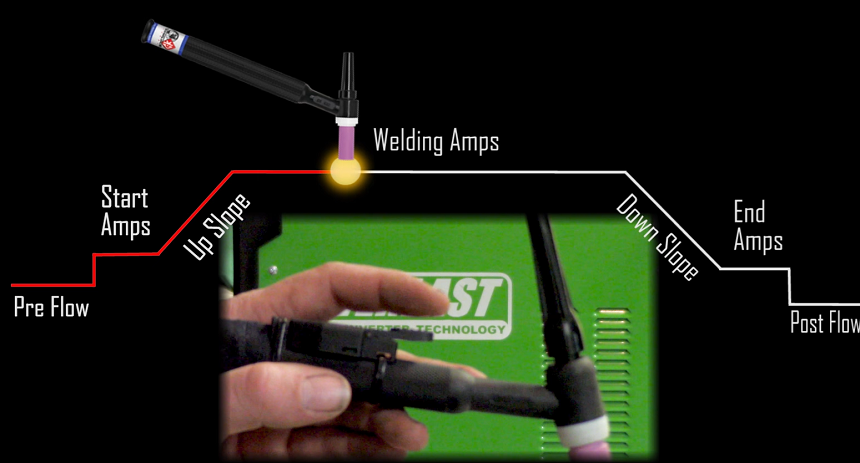
Using 4T in TIG welding is not as simple as 2T. It’s a bit more complex because you have to control the welding cycle and all of its stages. Before you even begin, you must set the starting amperage. Your TIG welder should operate at this amperage before it reaches the full working amperage.
To activate the starting amperage, press and hold the trigger on the torch and to start the upslope to the working amperage, release the trigger. When you are done welding, press the trigger again to downslope to the preset ending amperage then release to terminate the arc.
If you are on the market for a TIG welder and are feeling overwhelmed with all the options available, consider the highly acclaimed Weldpro Digital TIG 200GD. Besides welding steel and Aluminum, the welder is capable of MMA stick welding with the stinger it comes with. It is incredibly easy to use as it doesn’t need intermediate amperage control.
4T in MIG Welding
4T in MIG welding Trusted Source What Is MIG Welding & How Does It Work | R-Tech Welding What is MIG welding? Learn about the MIG welding process, get MIG welding advice and browse an extensive range of MIG welders and accessories. READ MORE… www.r-techwelding.co.uk is pretty much similar to 4T in TIG welding. The only difference is that you can weld without any pre-starting settings. All you have to do to start MIG welding is press the trigger and it will keep going. This allows you to weld for extended periods without holding the trigger. Stopping is also very simple as you only need to press the trigger and release it.
According to popular user reviews, the Weldpro MIG 155GSV remains the best compact and highly portable MIG welder on the market. It has both the 2T and 4T modes for convenience during short and long welds and can comfortably weld up to ¼-inch mild steel.
4T in TIG welding is more complex than 2T as it requires you to control all the stages of the welding cycles.
4T is ideal for long weld runs while 2T is perfect for short welds.
With 4T you don’t have to hold the trigger during welding. 2T on the other hand requires you to hold the trigger the entire time.
2T and 4T are almost the same thing on TIG and MIG welders but there are a few aspects that set them apart. The 2-touch setting is very simple and it only needs you to press the trigger torch to start and release to stop. It is perfect for short welds. The 4-touch setting is the most popular mode because it doesn’t require the welder to hold the trigger when welding. It is the prime option for long weld runs and welding hard-to-reach areas.
So many welders have the 2T and 4T settings as a standard but there are variations on how they operate. Their usage is different on MIG and TIG welder settings. All MIG welders come with a trigger on the torch, therefore, the 2T setting is nothing new.